Lezyne Micro Floor Drive HV pump.

The HV in the model designation stands for High Volume, but to look at it, you'd think you'd be lucky to get little more than Snail's sneeze out of each stroke. Looks though, really are deceptive, as this thing pushes air into a tube at a very impressive rate indeed. I bought it to carry in my rucksack after I got my Fatbike. I figured I'd die of exhaustion trying to infate the fat tubes with the titchy mini pump I had been carrying around, and this was one of two pumps recommended by Fat-Bike.com as being up to the job at hand.
The pump itself is really rather nice, a thing of beauty almost, being CNC machined polished aluminium and all smacking of quality build.
You get a small fold out foot on one side to stand on, but I kneel down and hold the body with one hand, and pump with the other.
Pumping is surprisingly easy, requiring no great effort or arm strength at all, and the connector screws on to the valve body nice and securely, rather than the slightly wobbly set up of my rather larger track pump. As you'd expect, the pump attaches to both Presta and Schrader valves.

I went for the model without a gauge, (my track pump has one for proper pressure setting) figuring that if this was for my every day carry for puncture fixing, then the time honoured thumb test would be good enough to get me home.
Maximum pressure is 90psi, which given this is aimed at MTBs, is more than enough (there is a HP designated model too for those with skinny tyres), and it weighs 205 grammes for its 300mm length.

I've had this pump a while now, and can't remember exactly how much it was, but I think it was £27 from Wiggle or Chain Reaction Cycles.
For Plus or Fatbike riders, a good pump is essential for dealing with punctures 'in the field', and this fits the bill very well indeed.
Those little CO2 inflators might be very quick and easy to carry, but I've heard they don't play well with high volume tubes, needing several cartridges just to get the tyre seated and inflated to a rideable 'get you home carefully' level. So I prefer the trusty, reliable, pump for my on the hoof inflatery.
A pump that is much recommended, so don't be put off by the puny looking dimensions, it packs a mighty punch.
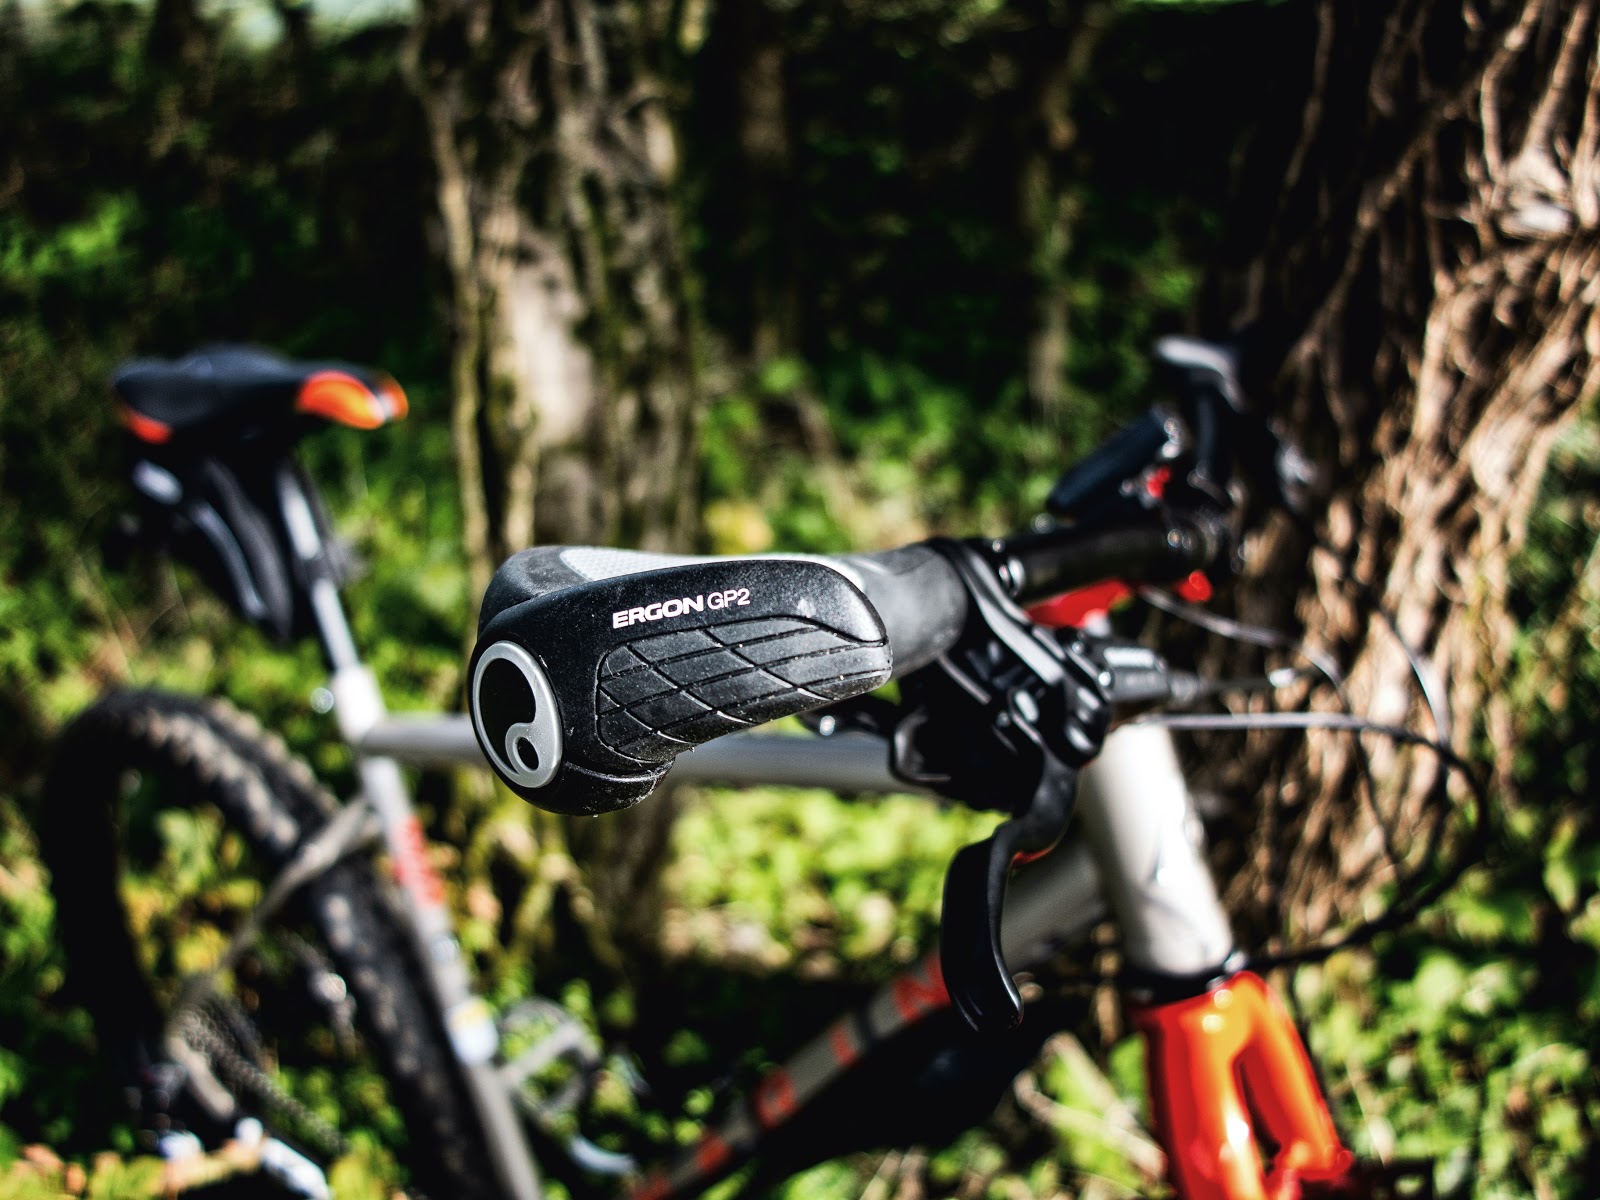
Ergon GP2 L Grips.

We all know how hard a time the contact points on a bike can give us, from sore bums to painful wrists and ankles. Wrist pains can be particularly nasty it seems, with tingling giving way to numbness for some, and prolonged pain for others that remains very uncomfortable long after a ride ended.
Curly barred riding folk have lots of options for shifting their hand position around, those poking flat barred mountain bikes and hybrids etc about have little in the way of options straight out of the box.
Bar ends were all the rage back in the mountain biking day, every self respecting mud flinging biker sported a set, but the Fashion Police have deemed them most uncool these days, despite their obvious advantages in varied hand positioning and also for leverage when climbing. Ok, they can snag on passing fauna, dragging you into the Rhubarb but hell, that's just all part of the fun.
Swapping the bars for something rather odd looking but extremely practical is an option. Butterfly bars can be nicked from the round the world touring types and put to use more locally, or the likes of the Jones Loop or H bars offer multiple grabby bits, as well as luggage accommodation into the bargain.

 But is there anything to be done if none of the above are personally wallet compatible or fail to catch one's eye?
Well there is, in the shape of Ergon anatomically designed grips (yes, we're back where we started, at last).
Now I actually don't suffer any wrist issues, but I do like having bar ends on my bikes for when climbing and just a change of position, often when cruising along some straight bit of road, or busting my lungs into the wind.
When I got the Marin, I hadn't planned on fitting bar ends, wanting to leave the bike looking standardish and handsome. But, every time I came to a hill I immediately wanted to turn my hands 90 degrees and reach for the non existent bar ends. Also, despite being very well made and attractive looking, the standard bar grips were thin and hard as coffin nails to grip.
Having a ton of Rutland Cycling loyalty points at my disposal I ordered up a set of Ergon GP2 grips and tiny bar ends in the large size, and thanks to Rutland's generosity, I didn't pay a penny. Result!
The difference in sizes available relate to hand size and the thickness of the grip around the bar, and although a medium glove size, I like fat grips so plumped for the large, and they are fine for me. The Ergon packaging cleverly allows one to try the grip for size without removing it from the box, so trying before buying to get the right size in the shop is possible.
As you'd expect coming from Germany, these grips are very well designed and made, and are a doddle to install - just slide 'em on and tighten up the allen bolt at the outer end, cunningly hidden on those models with bar ends, a highlighted feature on those without.

On those with bar ends, the angle twixt grip and bar end can be adjusted by simply slackening the allen bolt and rotating the bar end fore or aft, or the grip itself of course. Like a lot of these things, you fit them in your shed/workshop/kitchen, think you've got them bob on, then discover on slinging your leg over and punting the bike up the road, that some tweaks are needed. On my maiden voyage I stopped several times to administer tweakage, starting with the flat, heel area of the grip inclined upwards slightly in line with my arms as it were, but finished with the grips almost level.


There's no doubt in my mind that these grips enhance the comfort and control of a bike greatly (I have a similar set up on the Jamis, though using Ergon lookey likey grips and normal, stubby, bar ends). They're made of very tacky feeling rubber, so no slipperiness in wet or muddy conditions, provide alternative gripping options and are just far more comfortable than narrow, circular grips. Oh... and I nearly forgot, they reduce road buzz and vibrations through the bars as well.
These GP2 grips and bar ends in large should be around the £30 mark, and in my mind, are well worth the money. For those suffering wrist pain issues, they would seem a 'must try.'
Mucky Nutz XL Fat Face Fender Mudguard.

The HV in the model designation stands for High Volume, but to look at it, you'd think you'd be lucky to get little more than Snail's sneeze out of each stroke. Looks though, really are deceptive, as this thing pushes air into a tube at a very impressive rate indeed. I bought it to carry in my rucksack after I got my Fatbike. I figured I'd die of exhaustion trying to infate the fat tubes with the titchy mini pump I had been carrying around, and this was one of two pumps recommended by Fat-Bike.com as being up to the job at hand.
The pump itself is really rather nice, a thing of beauty almost, being CNC machined polished aluminium and all smacking of quality build.
You get a small fold out foot on one side to stand on, but I kneel down and hold the body with one hand, and pump with the other.
Pumping is surprisingly easy, requiring no great effort or arm strength at all, and the connector screws on to the valve body nice and securely, rather than the slightly wobbly set up of my rather larger track pump. As you'd expect, the pump attaches to both Presta and Schrader valves.

It is quite amazing just how quickly and easily this relatively small pump will over inflate (to seat the bead) the high volume tubes of the Fatty.
Maximum pressure is 90psi, which given this is aimed at MTBs, is more than enough (there is a HP designated model too for those with skinny tyres), and it weighs 205 grammes for its 300mm length.

I've had this pump a while now, and can't remember exactly how much it was, but I think it was £27 from Wiggle or Chain Reaction Cycles.
For Plus or Fatbike riders, a good pump is essential for dealing with punctures 'in the field', and this fits the bill very well indeed.
Those little CO2 inflators might be very quick and easy to carry, but I've heard they don't play well with high volume tubes, needing several cartridges just to get the tyre seated and inflated to a rideable 'get you home carefully' level. So I prefer the trusty, reliable, pump for my on the hoof inflatery.
A pump that is much recommended, so don't be put off by the puny looking dimensions, it packs a mighty punch.
---------------
Ergon GP2 L Grips.

We all know how hard a time the contact points on a bike can give us, from sore bums to painful wrists and ankles. Wrist pains can be particularly nasty it seems, with tingling giving way to numbness for some, and prolonged pain for others that remains very uncomfortable long after a ride ended.
Curly barred riding folk have lots of options for shifting their hand position around, those poking flat barred mountain bikes and hybrids etc about have little in the way of options straight out of the box.
Bar ends were all the rage back in the mountain biking day, every self respecting mud flinging biker sported a set, but the Fashion Police have deemed them most uncool these days, despite their obvious advantages in varied hand positioning and also for leverage when climbing. Ok, they can snag on passing fauna, dragging you into the Rhubarb but hell, that's just all part of the fun.
Swapping the bars for something rather odd looking but extremely practical is an option. Butterfly bars can be nicked from the round the world touring types and put to use more locally, or the likes of the Jones Loop or H bars offer multiple grabby bits, as well as luggage accommodation into the bargain.

Jones Loop Bars

Well there is, in the shape of Ergon anatomically designed grips (yes, we're back where we started, at last).
Now I actually don't suffer any wrist issues, but I do like having bar ends on my bikes for when climbing and just a change of position, often when cruising along some straight bit of road, or busting my lungs into the wind.
When I got the Marin, I hadn't planned on fitting bar ends, wanting to leave the bike looking standardish and handsome. But, every time I came to a hill I immediately wanted to turn my hands 90 degrees and reach for the non existent bar ends. Also, despite being very well made and attractive looking, the standard bar grips were thin and hard as coffin nails to grip.
Having a ton of Rutland Cycling loyalty points at my disposal I ordered up a set of Ergon GP2 grips and tiny bar ends in the large size, and thanks to Rutland's generosity, I didn't pay a penny. Result!
The difference in sizes available relate to hand size and the thickness of the grip around the bar, and although a medium glove size, I like fat grips so plumped for the large, and they are fine for me. The Ergon packaging cleverly allows one to try the grip for size without removing it from the box, so trying before buying to get the right size in the shop is possible.
As you'd expect coming from Germany, these grips are very well designed and made, and are a doddle to install - just slide 'em on and tighten up the allen bolt at the outer end, cunningly hidden on those models with bar ends, a highlighted feature on those without.

Ergon grip sans bar end looks pretty neat with that highlighted end plate surrounding the allen bolt.
On those with bar ends, the angle twixt grip and bar end can be adjusted by simply slackening the allen bolt and rotating the bar end fore or aft, or the grip itself of course. Like a lot of these things, you fit them in your shed/workshop/kitchen, think you've got them bob on, then discover on slinging your leg over and punting the bike up the road, that some tweaks are needed. On my maiden voyage I stopped several times to administer tweakage, starting with the flat, heel area of the grip inclined upwards slightly in line with my arms as it were, but finished with the grips almost level.

New grips lobbed onto the Marin and set for sea trials. There are only two things I'm not so keen on with these grips. One is the inner end of the fat grip just stops, no decorative polished collar or anything, just the end of a fat, black, grip next to thinner bar, making for a join that looks unfinished to my only mildly obsessive aesthetic eye. To combat that, I shunted my shifter and brake brackets along the bar a bit to butt up against the grip ends. Much better.
The second issue is the bar ends aren't really long enough to hang a baseball hat on, but that's a minor issue really, but something I have been known to do on other bikes.
The shape of these grips evenly spread the contact area across the whole palm near enough, avoiding pressure hot spots, and can also reduce the angle of dangle twixt forearm and wrist, the latter being a boon for those with Carpal Tunnel issues I understand.
Grips and bar ends are well made, even sporting softer rubber inserts on the bar ends.
At first experience, these grips seem to lock the hand into one, compact, position, with the outer edge of the hand up against the bar end almost, but in fact of course, there are various options to be had for how you hold the bars. Curl your fingers around them tightly or loosely, or just hold the heel of your hand on the broader pad of the grip and curl your fingers up slightly, or just dangle them in the breeze. Make a fist and just have the outer edge of your wrist in contact with the bar even. All positions still feel comfortable, and importantly, secure and still in control of the bike.


I like to relax when riding, or driving, and clinging on all the time just doesn't cut my mustard. I drive one handed when I'm happy with things on the road ahead, and likewise on a bike, my grip relaxes and I find it entirely natural to be cruising along with my hands just resting on the bars as above. Not possible with the old, narrow grips.
The bar ends themselves are best described as being stubby, or maybe simply as 'prongs.' They might appear to be a bit useless then for grabbing, but the curve of the outer edge of the grip is continued on up the short bar end, in effect, making the grip part of the overall bar end, while still supporting the heel area of the hand.


Despite the small size, the bar ends combine with the grips to provide all the benefits of the 90 degree angle change, accommodating the whole hand comfortably.
There's no doubt in my mind that these grips enhance the comfort and control of a bike greatly (I have a similar set up on the Jamis, though using Ergon lookey likey grips and normal, stubby, bar ends). They're made of very tacky feeling rubber, so no slipperiness in wet or muddy conditions, provide alternative gripping options and are just far more comfortable than narrow, circular grips. Oh... and I nearly forgot, they reduce road buzz and vibrations through the bars as well.
These GP2 grips and bar ends in large should be around the £30 mark, and in my mind, are well worth the money. For those suffering wrist pain issues, they would seem a 'must try.'
----------------
Mucky Nutz XL Fat Face Fender Mudguard.

A bit of a mouthful to say, but thankfully it isn't when it comes to ingesting mud and farmyard slurry courtesy of the front wheel.
As I've just learned, fat bikes really hurl the cack about with quite some enthusiasm. The just pooped your pants stripe up the backside is bad enough, but worse by far is the besplattered mush. Mud on glasses makes seeing where you going dodgy and who wants a face full of pre digested mooey food? Try riding through a farm yard after milking time in the wet and not licking your lips for miles afterwards... Mind you, this is what long sleeves are for on shirts/jackets, but that's not a real answer. Thankfully, these short fork mounted guards really work far better than their looks suggest at keeping muck off your face.
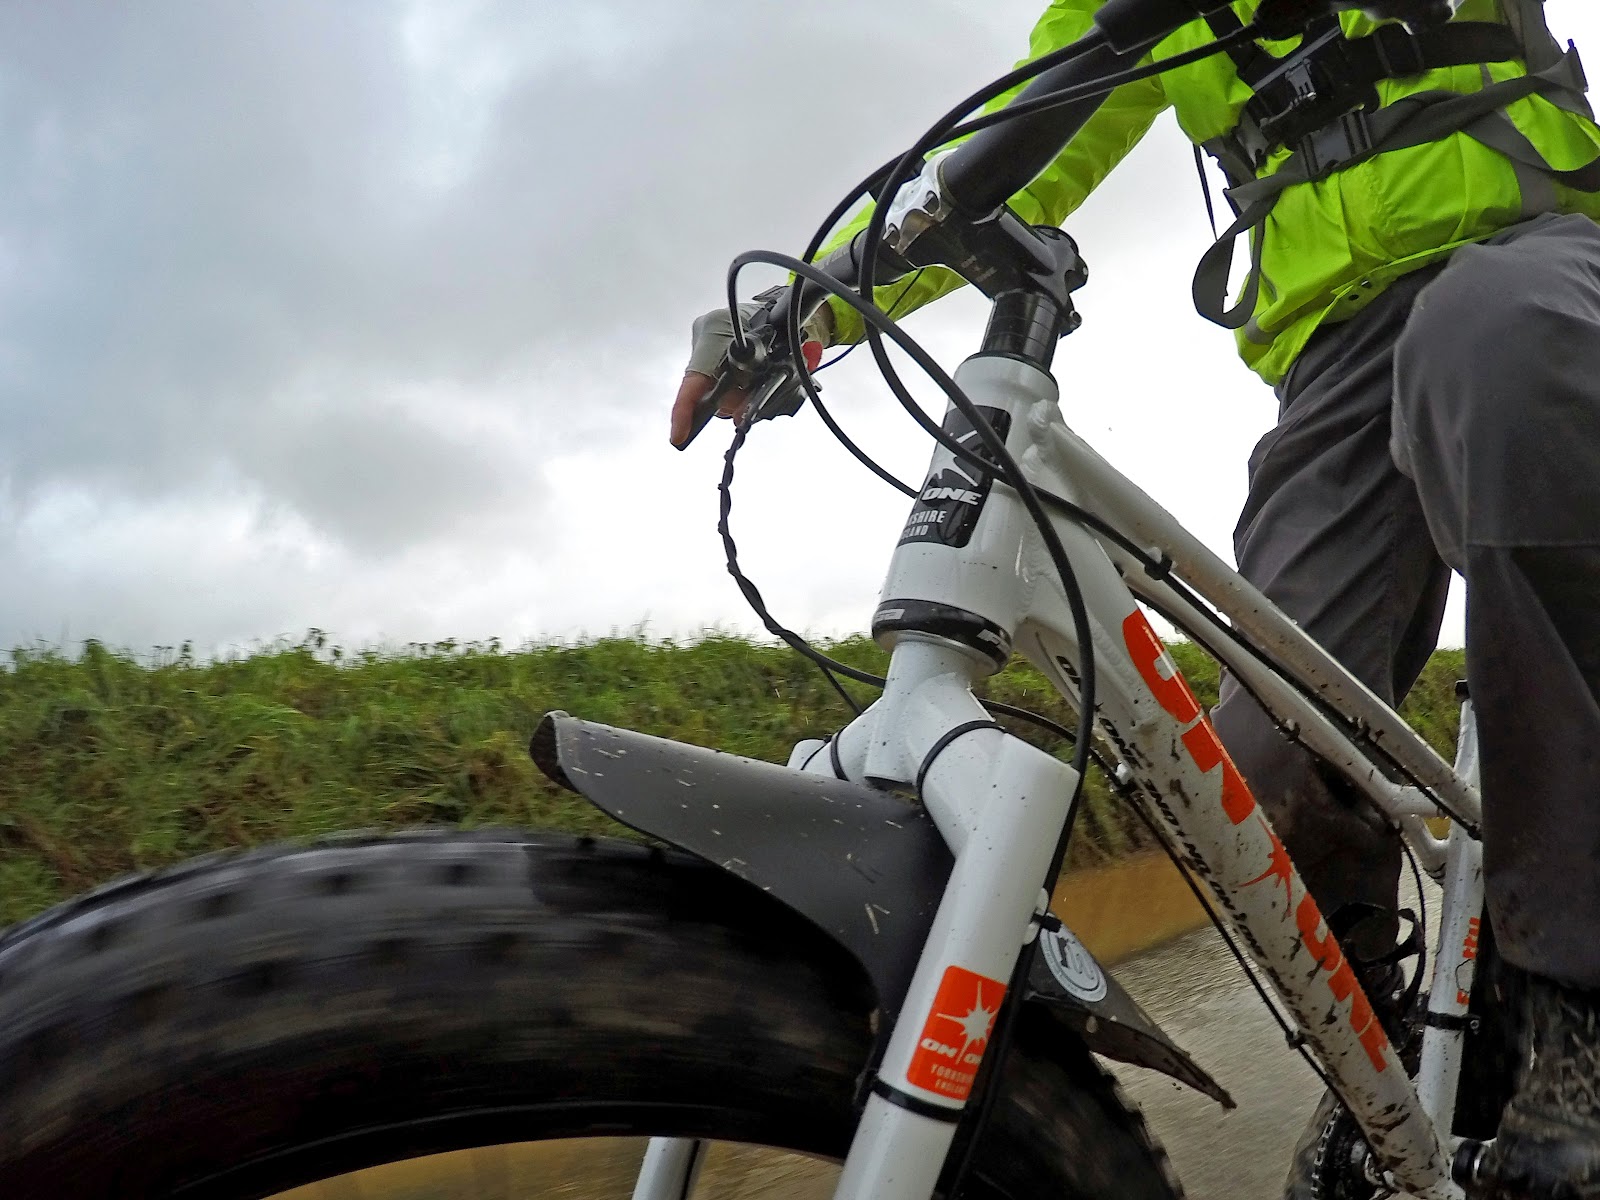
Mucky Nutz Fat Face Fender is designed to foil farmyard faeces being flung in your face. Never mind all the 'effin though... does it work?

The answer is yes. Look at the spray pattern and you can see some getting thrown forwards, and a lot more getting launched up towards my chest, but the face, what these guards are designed to protect, remains unsullied by flying grot. No more walking into posh cafes for a tea and slice of cake looking like you've just spent three miles following a muck spreader.
This Mucky Nutz item is a good case in point. It arrives flat but with slots cut in the sides. Overlap the slots until the holes line up to poke the cable ties or velcro strips through (it can be supplied with cable ties, velcro straps or none at all if you have your own) and it gives the guard that triangular appearance, but more importantly, more coverage than the usual straight and flat guard. Clearance over the top of the tyre is very generous too so I doubt clogging will an issue.
If you own a fat bike and don't fancy this type of guard, well Mucky Nutz also do a conventional looking flat guard that'll also do the job. Both types are compatible with all fat bike fork designs according to their web site.
I'm not sure fat bike owners fret too much about weight, but for the record, the XL featured here weighs 75g while the flat version just 45g.
More info on both guards and more can be found Here
----------------
Cat Eye Velo 9 Computer.
I'm not one for all the latest tech at all - my mobile is seven years old and I only turn the thing on to use it as an alarm clock anyway. As for on bike technoguffery, well I have no real need for heart rate monitors or recording my cadence, or Stravaring my every ride and poring over the details. I do like to know how far rides were though, and just out of curiosity, how many miles I ride and on each bike. So all my bikes have their own basic computers, and on the Voodoo and Fatty, they are (wired) Cat Eye Velo 9s. These are very reasonably priced, offer all the info, and more, that I want, and are easy to set up and read.

The Velo 9 has a couple of extra features over the Velo 7 on the Jamis - Calorie consumption and Carbon Offset. Otherwise both models feature the usual current speed plus the average for the whole trip and the maximum velocity attained, trip and total mileages, elapsed time and the clock. There is also a little pace arrow to indicate how well you're doing compared the average speed for the journey so far.
Set up is easy enough, although the table of wheel and tyre sizes didn't include the Fatty's donut like hoops. To input them just meant selecting the wheel size (26") then measuring one revolution of the wheel (valve to valve is easiest obviously) and inputting that figure.
I did see somewhere how the calorie consumption is calculated (some medically recognised table is used as the basis for the info I think) but it's bound to be a bit vague and anyway, Cornish miles are easily worth a mile and a half of up country miles thanks to all the hills round here, so where it thinks you're just being a lazy so and so and pottering along slowly, you could in fact be grinding away up some near vertical piece of geography, sweating like a Turkey on Christmas Eve.
As for offsetting some carbons... well I don't understand all that palaver, and care even less to be perfectly honest.
But these Cat Eye computers just work - easy to read, seem reliable, and record all the info you need from my basic stuff through to the higher models that record all sorts of clever details. Spare parts are also readily available too, so all in all, well worth considering if in the market for a bike computer.
---------------
LifeLine Wet Chain Lube.
My normal 'go to' chain lube up to now has been Muc Off's wet lube - It smells fruity, works well enough, is reasonably priced, and vitally, that sexy looking bottle has a long nozzle, something other manufacturers might like to consider. Why? Because it makes lubing the front and rear derailleur pivots easy peasy. WD40 does the job too, but I like to use something a little thicker and longer lasting.
But I saw this here chain lube reviewed in a mag recently, and they gave it a glowing report so thought I'd give it a go seeing as I was indulging in some retail therapy anyway.

I believe LifeLine is Wiggle's own brand, so won't be found elsewhere if it is. The bottle is a very dull looking affair compared to Muc Off's seductive, sexy black, tactile and curvaceous affair (blimey...) but a dull looking bottle and even duller looking label don't matter, it's the nozzle that's important here, and I'm glad to say it has a long and thin jobbie, just the job for probing into all the crevices, nooks and crannies of one's pivoty bits.
The lube itself looks a bit like Cherry Aid, and probably tastes better, but there is no fragrance to it that I could detect. If you like your bike chain smelling like a brothel cat, get the Muc Off. Application is easy enough of course, but it does string off the chain as you rotate the pedals, something the Muc Off doesn't do. No bother of course as running the chain through a rag to wipe off the excess cures that.
In use it seems to be very good. I've had several runs through a deepish ford, and many puddles (I'm a big kid where water and bikes are concerned) and the roads are blathered in grot at the moment anyway. But the chain appears to have attracted hardly any gunge, unlike the Muc Off which does end up looking thick and crusty after a while with dirt, mud, twigs, small animals and all sorts stuck to it. Nor has it washed off, so all that is a another plus, and everything else seems peachy as well, the chain runs silently and gears snickety snick perfectly happily.
So all in all, this seems perfectly good chain lube, and for £3.50 for a 100ml bottle, is well priced. Buying at Wiggle of course also means you get free Haribo, so it's a win all round then!
----------------
Charge Spoon Saddle.
The perch on the Jamis was not good at
all, not only was it a pain in the posterior, it also looked cheap
and nasty – it had to go.
Look on any forum post asking what
saddle is best and count how many posts recommend a Charge Spoon –
there'll be loads of 'em no doubt. So when Wiggle had their sale and
the Spoon was offered at a silly low price of £18 I took the plunge,
and I'm glad I did.

The Spoon is surprisingly light in
weight at about 258grams, and looks and feels, very well made. Not
only that, it is every bit as comfortable as the reviews say, not
bothering my backside for as long as my rides can take me.
As if that isn't enough, you can even
get Spooned up in whatever colour takes your fancy. I went for sexy
black as it matches the bike, but you can get brown (looks better
than it sounds), white, dog's cock red and 70s bathroom
suite blue. I've just had a look on Wiggle again and it is still
under twenty quid, at £19.76, and that is an absolute bargain.
http://www.chargebikes.com/
http://www.chargebikes.com/
----------------
Mirrycle MTB Mirror.

Since fitting a mirror to the Jamis I've not looked back...
Mirrors seem to be one of those things
that polarises opinion – some wouldn't ride a bike without one,
others wouldn't dream of defiling their machine with such an
abomination.
I find one useful as it happens, and
have one on the Jamis, as that pretty much travels only on the road.
I had tried a cheap mirror on Lump, an old Giant hybrid, but cheap in
that case really did mean nasty. Not to be put off, I thought I'd, ahem, look into a Mirrycle jobbie. They go for about £15, so aren't
seriously expensive, but are very good quality. They mount in the end
of the bars and can be sited pretty much in any position you fancy. I
thought the bar ends on the Jamis might ne a nuisance so decided to
set it up under the bars, where it is also nicely tucked out of
harm's way. Under there it took a little tweaking to get just right,
but erm... on reflection, the effort was worth it with a very useful
rear view available. Given all the tweaking for my set up it is a
good job the mirror is well made, as it has not moved at all unless
I've caught it by accident. Road vibration not only fails to blur the
view behind, but it stays where you put it, unlike the previous cheap
thing which would rotate merrily and give you a cracking view of the
tarmac and little else.

Given all the adjustability on offer,
and the three inch diameter convex glass, if you can't get one of
these set up to give a good view behind then you need to look at your
neck or something. All the hardware is well made and it looks like
it'll last a life time. Apparently you can even get spares from the
good folk at Mirrycle should you need them, as well as mirrors tailor
made for drop bars and STI levers.


More info and other products can be
found at http://www.mirrycle.com/index.php
---------------
Mucky Nutz Style Mudguards.


The first thing my cycling neighbour
asked on seeing the front Face Fender as the people at Muckynutz call
their mudguard was 'does it actually work?' The answer is yes, very
much so. These guards, (other similar makes are available) might not
look much, but they do a good job of keeping your face and
glasses/eyes free of muck.
The one in the photo is actually the
wrong fitment for that fork, it's meant for forks with a rear facing
bridge, but I don't care, it still works.
We country dwellers have to negotiate
farm yards on a frequent basis, and that means cow shi cow slurry
everywhere. Riding along trying not to lick your lips is not easy,
and who wants a face splattered with a Mooey's dinner anyway? Wet
roads of course pose a problem the whole time you are moving, but
these guards eliminate all the cack being thrown up into the air
ready for your face to speed into.
They aren't cheap for what they are
really, so I did use the one I bought as a template and made my own
for the other bikes in my stable.

I used the base of a bag for life (well at my age, and the way I feel sometimes, it wasn't seeming such a good investment after all) which proved to be too thin. They worked well until one had a big lump of mud caught between it and the tyre, and the other ripped out of it's mounting hole when the bike fell against a tree. So if you make your own, make sure the material is a decent thickness.
Muckynutz.

Home made front guard on the Voodoo wasn't thick enough plastic and soon tore out of its mounts.
I used the base of a bag for life (well at my age, and the way I feel sometimes, it wasn't seeming such a good investment after all) which proved to be too thin. They worked well until one had a big lump of mud caught between it and the tyre, and the other ripped out of it's mounting hole when the bike fell against a tree. So if you make your own, make sure the material is a decent thickness.
Muckynutz.
---------------

Slime Self Sealing Inner Tubes.
We all hate punctures, myself
particularly, so anything that can help ward them off has to be good
in my book. I know old school cyclists rumble on about weight, and
the Zennish joy of patching a tube by the roadside, but I prefer not
to bother with all that, and hopefully stop the air escaping my tyres
in the first place. So all three of my bikes have Slime Self Sealing
tubes fitted. Yes they cost a bit more as well as weighing a bit
more, and no doubt, they can make an unholy mess inside the tyre
casing when they do their thing, but I don't care.

Foiling the Puncture Fairies.
See that green gloop oozing out of the
tyre on the Carrera? That happened when I noticed a huge thorn
sticking in the tyre. Faced with the old 'pull it out or leave it'
dilemma, I opted for giving it a tug and sure enough, air started
escaping. A quick lift and spin of the front wheel saw a lime green
Catherine Wheel effect splatter everything in range in green gunge,
but after a few seconds, the hissing stopped. Giving the tyre
pressure a test by using both thumbs found the tyre still acceptably
hard, so I rode on. Getting home and checking the pressure found only
a few pounds of air had been lost.
So that's good then, but even better is
all that happened on the 30th of September 2014, and here
I am in July 2015 having done nothing to the tyre or tube since other
than routine checking of pressure and inflating as required. I call
that a win all round.
Fanny about with tyre levers, bowls of water, bits of sandpaper and grating bits of chalk, messing with glue and patches and all that carry on? I don't think so.
Fanny about with tyre levers, bowls of water, bits of sandpaper and grating bits of chalk, messing with glue and patches and all that carry on? I don't think so.
---------------
No comments:
Post a Comment